Marketing in Teachable: Tailor your messaging with multiple sales pages


As an online business owner, you interact with your audience on a consistent basis. But, as your business grows and your customer base evolves, you might find your messaging doesn’t fit every demographic. As a larger business, you’ve got to reach people outside your core audience. But, how can you do that without jeopardizing the messaging strategy you’ve already crafted for your core audience? We’ve just rolled out the ability to create multiple sales pages for a single course to solve this problem. Now, you can target new audiences and test out different messaging strategies to see what works best.
Multiple sales pages

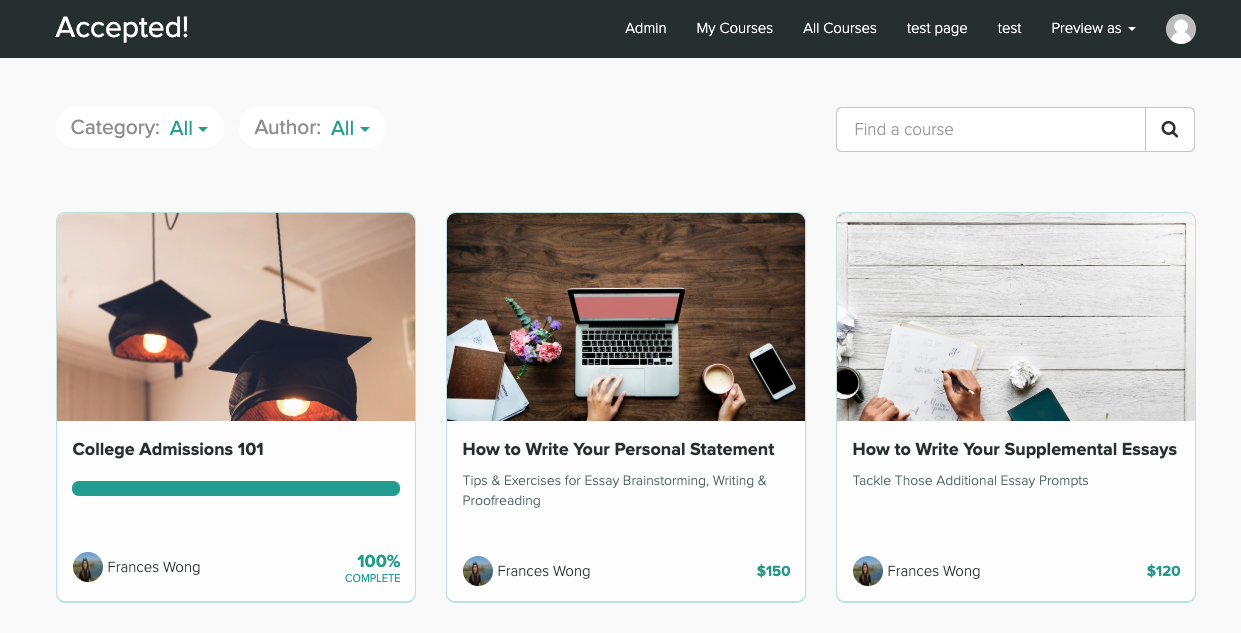
By default, a sales page template is generated for your course to help you get started. It also serves as the default primary sales page for your course—where your audience will be directed if they find your course through your course listing. Any additional sales page you create will have a different customizable URL that you can create and send dedicated traffic to.
So, why and how should you create multiple sales pages?
Targeted sales copy
There are so many use cases for doing so, but the most important one we want to highlight is for testing your sales copy.
Maybe you’re looking to improve and refine your current sales copy. Maybe you’re planning an expansion to reach a different audience segment. You can achieve both by creating additional pages and experimenting with variations in copy without changing your core sales funnel.
It’s important to start by segmenting your audience and crafting an appropriate messaging strategy. Do some research about your audience and think about:
-
What are their biggest pain points?
-
What are their blockers right now?
-
How can you support them in achieving their goals?
-
How will your product reduce or solve their pain points?
-
Who are they influenced by?
-
Who do they go to for advice?
This exercise helps you breakdown the key points you need to include in your sales page copy to catch your audience’s attention. In fact, you might realize all you have to change is the headline of your sales page—which can still go a long way.
Explore your designs
Now that we’ve covered your sales page copy, it’s equally important to think about design. Is it better to add a call-to-action button at the top of your sales page? Does your audience expect to see the full curriculum in the sales page?
Duplicate your page, then make some visual changes to see how they convert.
Run different sales campaigns
When you’re running an audience-wide promotion, you can create a coupon and preset the URL so your audience automatically sees the discount and offer. But what if you’re working with specific partners or want to run a flash sale?
Keep your advertising traffic funneled to your primary sales page, and create a separate sales page dedicated to a different campaign.
For example, let’s say you’re offering your partner’s audience a 50% discount on your course. Duplicate your main sales page, and add a content block addressing their users. By doing so, you are not only personalizing the sales page specifically for your partners, but you’re also making sure that your core sales funnel functions the same way.
Analyzing conversions and tests
Being able to tailor your messaging is useful, but seeing the effect and the actual conversions is what really matters. Let’s run through how you can monitor conversions using our native integrations.
Using Google Analytics
Schools on a paid plan have a native Google Analytics integration that—when enabled—will track your Teachable site traffic. To use Google Analytics to monitor how your different sales pages are doing, here’s what you need to do:
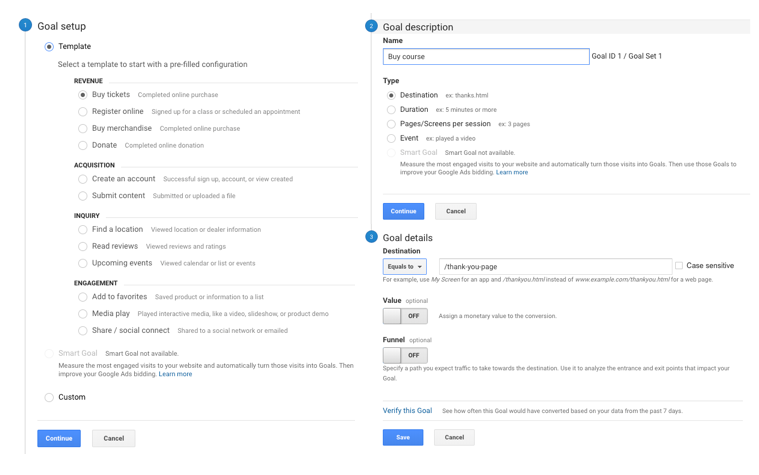
Define the conversion as your goal
-
Log into Google Analytics, and navigate to Admin > Goals.
-
Set up your goal from the list of templates. In this case, “Buy tickets” is the closest match.
-
Set your goal name, like “Purchased course” and set the type as “Destination”
-
Under goal details, set the destination to the URL of your thank you page, such as “/thank-you-page”
-
Hit save!
Monitoring conversion
Within your Google Analytics dashboard, find the Conversions on the left navigation bar. For the purpose of seeing how each of your sales pages are converting, you can use Reverse Goal Path and see which sales page is converting better.
Goal Completion Location: Whatever URL destination you’ve set in your goal. In this example, /thank-you-page
Goal Previous Step-1: This will be your checkout page URL
Goal Previous Step-2: This column is the information you want. Which sales page URL is appearing more and converting better for you?
If you need some help to get started with Google Analytics, checkout this blog post.
Using Facebook Pixel
Schools on a paid plan have a native Facebook Pixel integration that—when enabled—captures sales page view events and purchase events, so once your ads are set up, you can monitor the traffic and performance of your sales pages from your Facebook Ad Center.
If you’re already running Facebook Ads, duplicate the ad you’ve created in your campaign and label it “Secondary Sales Page” (or anything that helps you differentiate the ads). In the ad you just created, change the website URL to the secondary sales page URL.
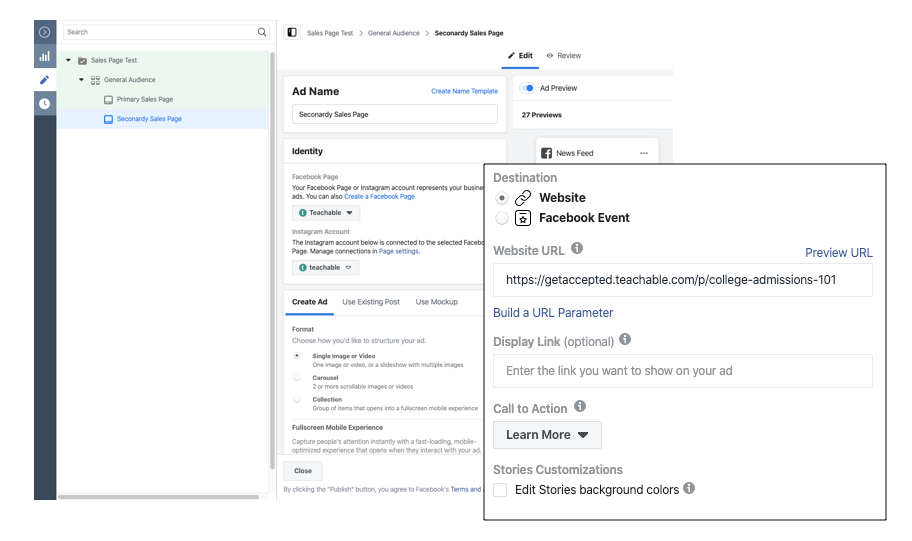
By doing so, you’ve duplicated the same sales funnel with a different sales page. Make sure not to make modifications to the ad itself. For the test to be fair, you need to keep the ad, ad set, and budget the same, so the only thing that’s different is the sales page.
Now you’re ready to see how they compare. Monitor how the ads perform: which ad and sales page is giving you better conversions? Continue to experiment and improve your sales funnel and conversion rate. If you need more information about running Facebook Ads, click here.
Customization: Your building blocks
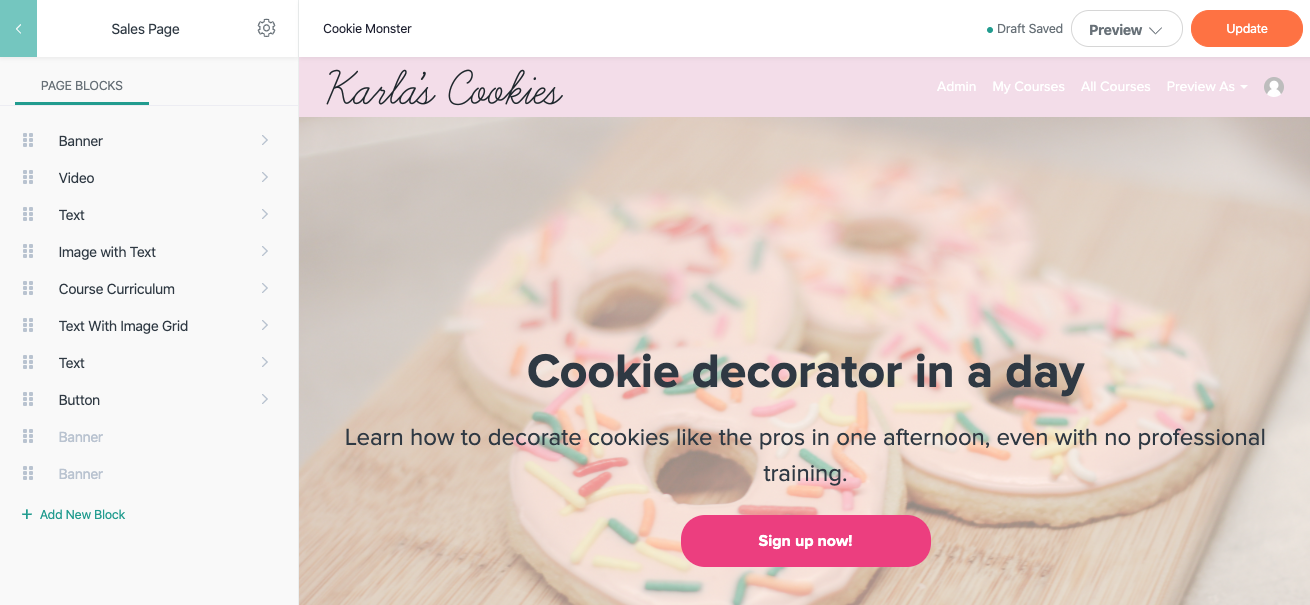
Our simple drag-and-drop page editor allows you to build your pages—there’s even a live preview so you can see the results immediately—using a variety of content blocks:
-
Images
-
Texts
-
Buttons
-
Video
These content blocks form the core of your page’s content, and you can customize them as you see fit. Similarly, you can also add different layouts such as:
-
Image with Text
-
Banner
-
Text with Image Grid
Using these layouts, you can build out and add student testimonials, author bios, course categories, and more. Plus, there are dynamic blocks you can use:
-
Feature Courses
-
Course Curriculum
-
Pricing
These dynamic blocks will pull information you’ve already added in your course so you don’t have to keep updating them. Learn more here in our Knowledge Base.